


Here is my tutorial this month for July's Scrap That Kit
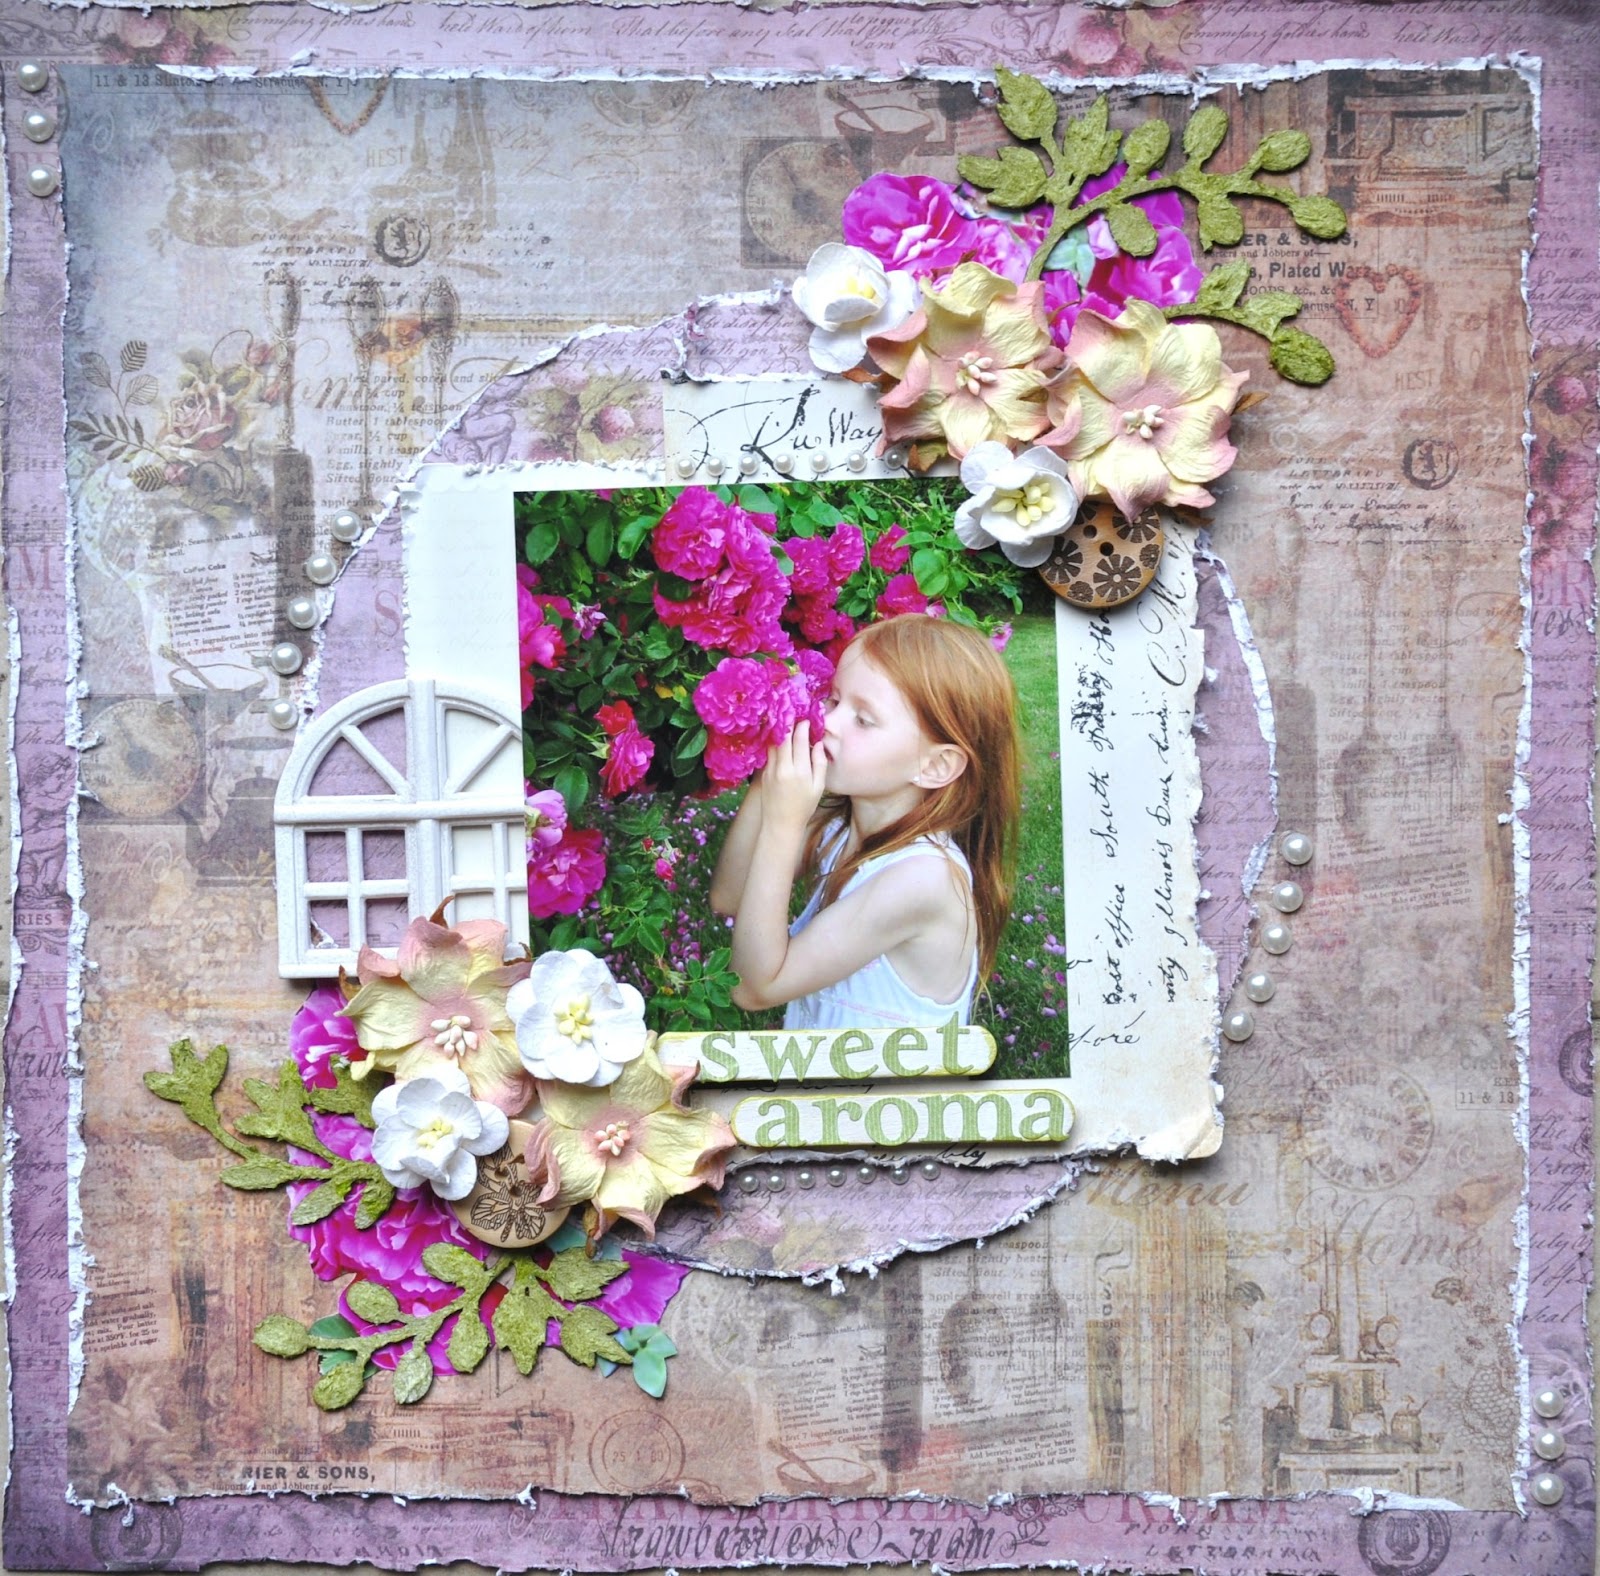
1. First take the purple-pink paper and cut a 7 inch circle right in the middle of the paper
(I apologize about the differences in color of the papers but one was taken in a darker room so it looks pink and the other in the light and it looks purple)
It is the same paper though so not to worry.

2. Using your favourite distresser tool, distress the edges of the purple paper. I used my Zutter Distrezz-it-all but any tool will work.

3. Take the brown paper from the kit and cut an inch out of 2 of the sides, one from the top and one from the right (or left).

4. Then distress its edges and place over the purple paper.

5. Distress the circle's edges too and place it in the middle of the page

6. Layer the photo over 2 pieces of packaging paper. I used leftover packaging from Prima and Melissa Francis embellishments that came in the kit.

7. To accent and match the photo I used my own photograph of the pink flowers and cut out the flowers into pieces.


8. I took a couple of chipboard branches out of my stash and covered them in Fiber Paste. (you may use any type of branches or flourishes as an accent for this piece)

9. Then I sprayed them in green Adirondack ink by Ranger.


10. I took the 2 craft sticks and covered them in Tim Holtz Distress stain: Picket Fence


11. Once dry, using the alpha from the kit, I added the title on top of the sticks.

12. Finally I arranged the layout and added flowers, buttons, pearls, window frame and other embellishments all together together.
.JPG)
.JPG)

Hope you enjoyed my tutorial and if you have any questions please visit my blog at:

12 comments:
wonderful build a page tut...gorgeous papers LOVE that collection too :)
My fave part is fussy-cutting the purple flowers from a different picture to build the layers. Such a neat idea! The photo goes perfectly with the pps and I love the title on the lolly sticks.
Thank you for leaving such sweet comments on my blog, Keren. I really value your support :)
Как красиво!Это волшебно,глаз не отвести!
Awesome BAP .. love the flowers you took from your photo .. great idea!
This is soooooooooooooo GORGEOUS!!! I love love love love the colors, the layers, the distressing... you are simply amazing!!!!
Thanks so much Keren for sharing the tutorial on building a layout. Yes she is a true model that girl!!! Your color tones really complement the photo!!!
Keren this is beautiful, so adore the photograph, ever so precious! Everything just matches to perfection..
Ooooh! This is gorgeous & I LOVE how you used your own flower photos...that's really neat...must take a leaf out of your book...I've LOTS of them around:):):)
Nicely done Keren! Gorgeous picture and flowers... You got everything to match so nicely.. I enjoyed checking this one out.
Oi Karen
Amei sua página... é muito linda!
Suas dicas são muito legais!
Xo
HI Keren! this layout is really gorgeous and I enjoyed watching it come together!! and i love the idea of using your photo to add the perfect color to back ground flowers.. very clever!
GREAT tutorial Keren! Love how you have done your branches & cut out your flowers from your photo!!
Post a Comment